How to complete the For England mission in MI6's HQ.

After spending time fending off androids in the Antarctic Circle in Mission 9, it’s time for Mission 10 — For England in 007 First Light. This is a rather impromptu mission after Bond turned himself in to the MI6, but when the HQ finds itself amidst a security threat and Bond’s holding cell is opened, he obviously takes it upon himself to see what’s going on.
To help you with the mission at hand, here’s my 007 First Light Mission 10 walkthrough.
To see this content please enable targeting cookies.
If you need any further help sleuthing around as James Bond, check out our 007 First Light walkthrough.
007 First Light Mission 10 walkthrough
After the holding cells are opened during a security threat at MI6’s HQ, Isola will make her escape while you – Bond – decide to go and see what all the fuss is about. First, you need to escape the cell block.
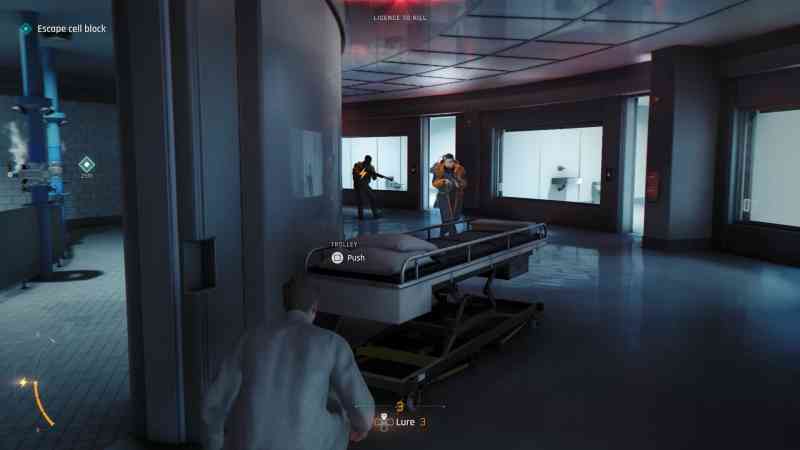
1. Escape the cell block
As you press ahead, you’ll immediately run into some guards and will quickly notice that you don’t have your Q-Lens or Gadgets to hand. This means you’re going to be relying on the environment and your fists to clear out these intruders.
I started by taking cover behind the trolley then pushing it into the men as they walked past. Then, enter the shower room to the left and interact with the valves to fill the room with smoke. This will disorient the men, allowing you to go about fighting them more safely.


Once you down at least one of the men, you’ll be able to retrieve their gun and start shooting the rest of the guards from the smoke.
After they’ve been cleared out, go through the door up ahead and speak to the injured staff member; she’ll tell you to use the red phone in the security room upstairs.
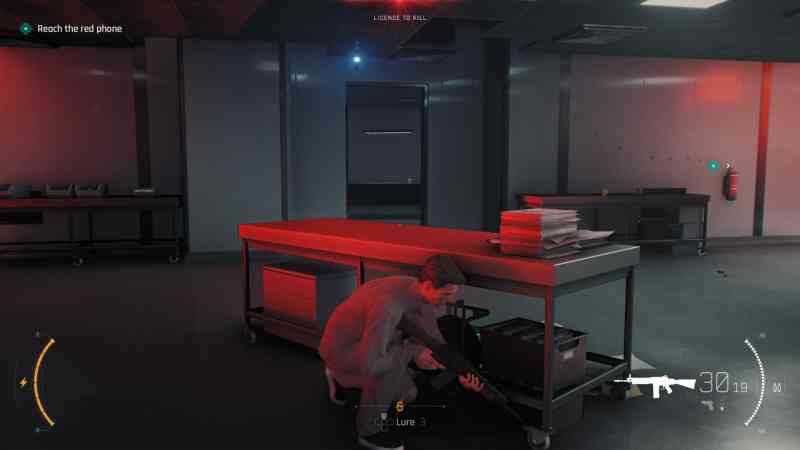
2. Reach the red phone
Go through the door up ahead and prepare for more guards on your right. Rather than fight them, go through the office door pictured below and vault into the room beside it. In here, there’s a vent you can go through, allowing you to avoid these guards entirely.

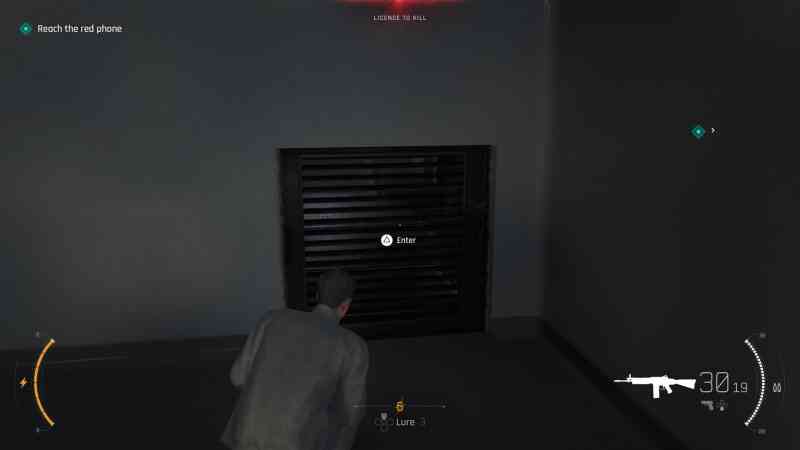

As you exit the vent, there’ll be a guard on your left; perform a takedown on him before he sees you.
In the next hallway, there are multiple guards who are quite tricky to avoid. First, interact with the button beside the window to close the shutter so you have some cover, then open the door. This alerted one of the guards to my presence, and I then proceeded to shoot him as he entered the room.
The other guards would then follow the gunfire, and I shot them one by one as they entered the room. This felt a little easier than trying to tackle them all at once in the hallway.
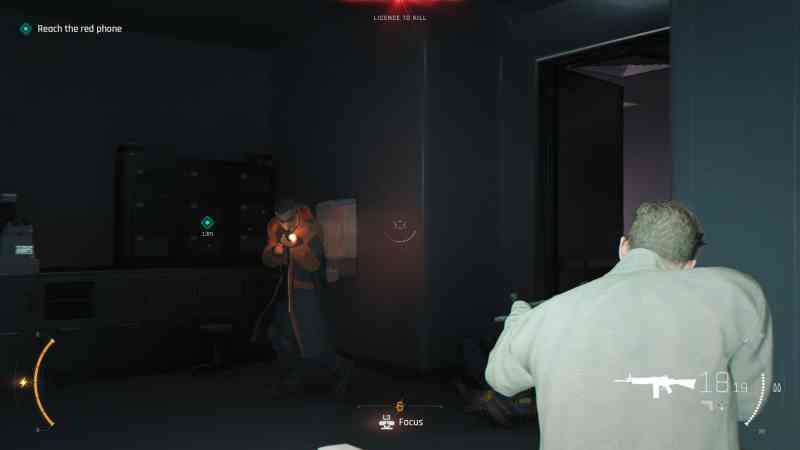

Once the guards have been downed (I had to take on six in total here), go through the door marked by your objective marker just up ahead.
The following room is the security office, but you need to reach the CCTV room in the office to be able to access the red phone mentioned earlier. On top of that, the security office is full of armoured guards who are patrolling each exit. At this point, you’ll receive a hint telling you to create a smokescreen to reduce the guard’s visibility of the room. Let’s go and do that.
Head into the server room on your right and perform a takedown on the guard here, then go up the yellow ladder.


Go through the vent atop the ladder and you’ll find yourself on the platforms above the security office now. Keep left and release the first valve you come to; this will fill the room with smoke.


Next, press ahead so that you’re at the edge of the platform. The exit you need to go through will be just up ahead, on the same level as the guards. Wait for this area to be clear of any hostiles, then jump down and sneak over to the exit.
You can also release the hanging lights in this room while on these platforms, and they’ll clear out any guards beneath them. This is optional, but it’s pretty fun.
In the next room, you’ll see the red phone up ahead, but there’s a guard to the right to take care of first. Throw the cans on the desks at him to stagger him and then punch or grab attack him until he’s been downed. Then, interact with the red phone finally.
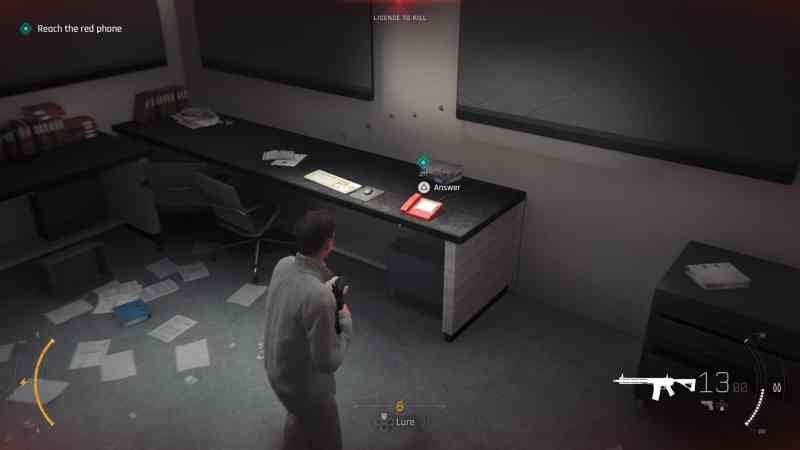

After the phone call, grab the earpiece from the guard you just took down. M will also have reactivated your Q-Lens now.
3. Locate Moneypenny
With the earpiece equipped, M will now instruct you to go and find Moneypenny. Follow your objective marker into the stairwell and head downstairs next.
You’ll find yourself in the Operations Offices next, alongside more guards. Here, the guards are on the move investigating the area so I proceeded to sneak past them – going along the left-hand side of the room – whenever they didn’t have line of sight on me.
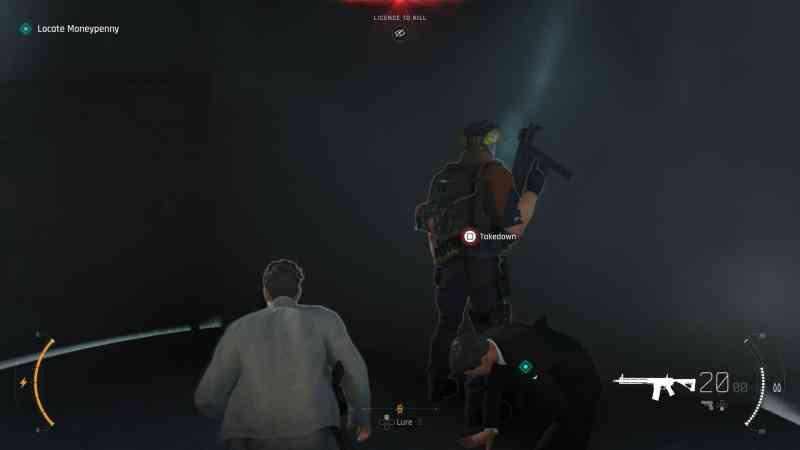
When I got halfway through the room, I took a detour into the office with two hostages (shown below).
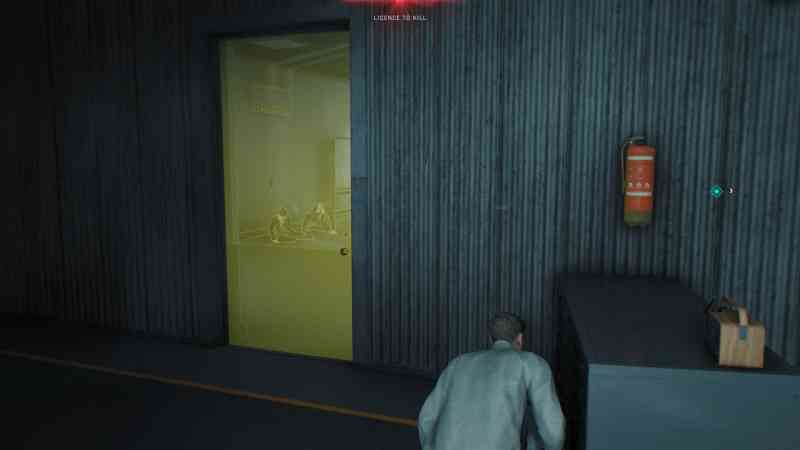

In this office, you’ll be able to see your next exit as well as two guards standing directly in front of it. Your goal here is to lure these two guards into the office and quietly take them down, though you might find yourself luring in and taking down other guards during this process.
I started by kicking open the door that faced them and then sought cover while they came over to investigate, then once they were in the room with me, I tampered with the air conditioning unit to reduce their visibility. This then allowed me to sneak over and takedown each of the guards one by one.

At this point, there was just one guard near the door but he was fortunately on the far side of the room, meaning I didn’t have to walk past him at all. As a result, I could now sneak out of the office and straight over to the exit.
In the next room, enter Moneypenny’s pod. Before long, the pod will explode and you’ll then be prompted to clear out the Operations floor of hostiles.
4. Clear the area
When it comes to clearing out the Operations Floor, your best bet is going in all guns blazing. I started by throwing the mug on the desk directly in front of me at the nearest guard and then performed a takedown on him, which gave me his gun.
From this point onwards, I began shooting the guards while staying in cover, but would slowly push forward whenever there was space to do so. On top of that, whenever an opportunity presented itself to throw an item at a guard, I would do that and then promptly perform a takedown on them; it’s much more fun clearing guards out this way honestly, and it saves your ammo for the next guard who sneaks up on you!


As you clear the room out, snipers will appear with green laser sights on them that you’ll need to avoid and ultimately clear out. That said, bullets alone won’t do when it comes to taking down the snipers. For the furthest sniper, you can shoot the red pipes beneath the platform they’re on to quickly put a stop to them.


As for the second sniper, I simply ignored them once the rest of the room was clear and entered the office beneath them as they don’t pose much of a threat if they can’t see you. In here, there’s a vent you can go through to continue.
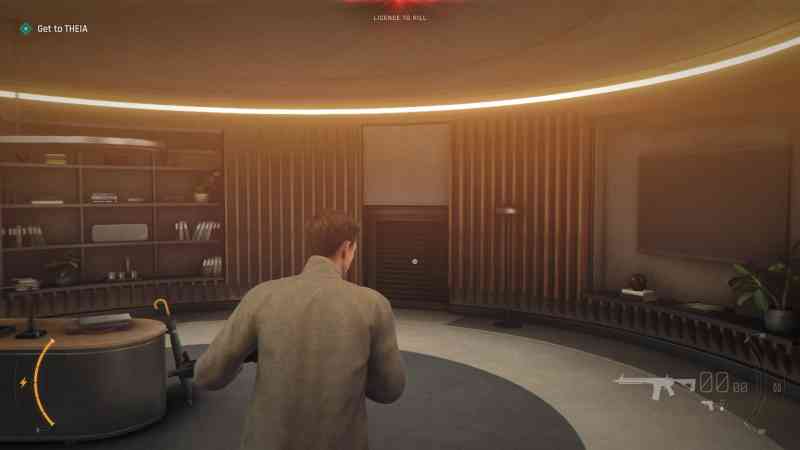

5. Get to THEIA
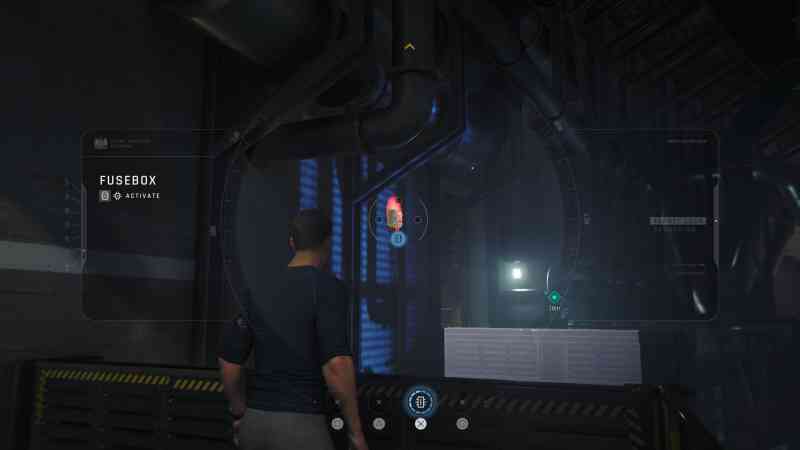
Go through the following tunnels until you reach another vent, except you can’t enter this one as there’s a fan spinning inside. Climb up the ledges to your right and then turn off the fusebox at the top; you can now go through the vent below.


Go down the upcoming ladder to arrive at a hallway above the Q-Lab, where there’s inevitably more guards to be cautious of. Through the next vent, there’ll be a brief cutscene showing Q sneakily crawling into a sofa that appears to be some sort of secret exit.
Exit the vent next and jump into the elevator shaft, then start making your way downwards. Upon exiting the elevator, there’ll be three guards to fight. You can instantly takedown the first and will be automatically put into Focus mode to kill the second. As for the third, pop a bullet or two in his head quickly. That’s those guys taken care of!
Go ahead and enter THEIA next, where you’ll find Moneypenny, Damien Webb, and some guards.


6. Stop Damien
After a rather eventful cutscene, it’s all down to you to put a stop to Damien Webb once and for all. Q will have given you his keys so that you can kit yourself out appropriately in the Q-Lab before then venturing through the tunnels, which is Damien’s only way of exiting the building.
Go down the hatch and squeeze through the gap ahead. Your path is now blocked, but this is easily sorted; look for a red fusebox to the right, just past the blockade (shown below) and hack it.
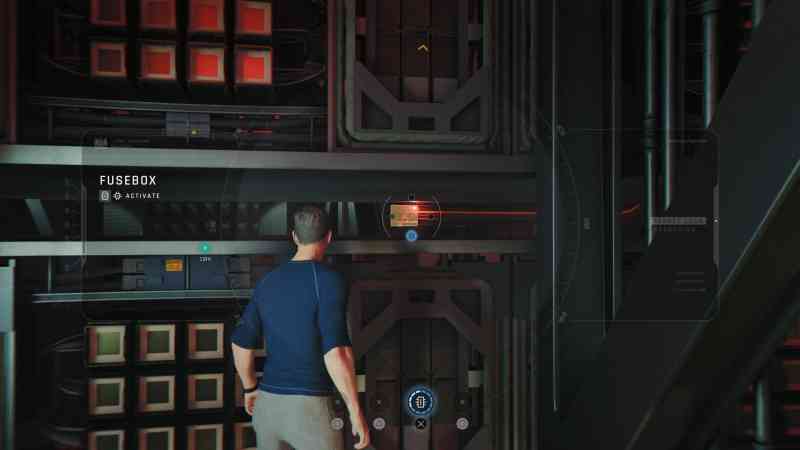

Continue to head forward and when you reach the closed bridge, hack the fusebox that’s directly across from it (shown below) then keep moving.
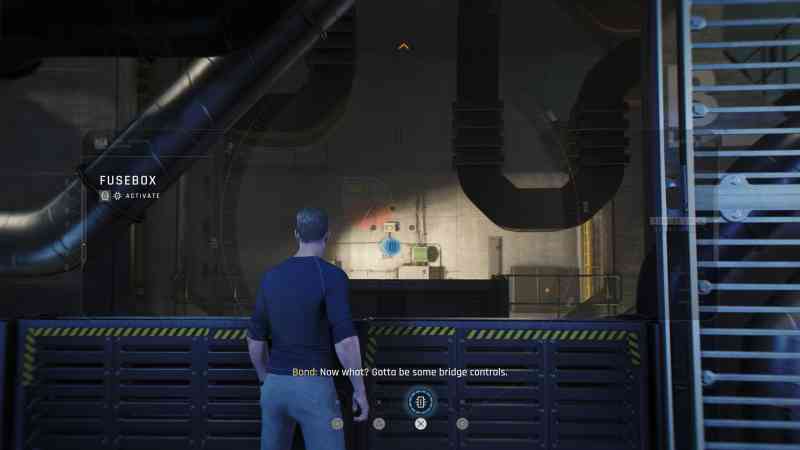

Up the ladder, there’s yet another bridge whose fusebox you’ll need to hack to be able to keep going (pictured below).

Continue along the following hallway until you come to a broken elevator. Here, you need to push the yellow trolley to reveal yet another fusebox behind it. Hack this, and you’ll then be able to enter the elevator shaft.


In the shaft, use the ledges and pipes to climb upwards. You’ll find yourself in Q-Lab next and rather conveniently, there’s a Gadget Station right here for us to modify our loadout with. I personally opted to take the Missile Pen, Dart Phone, and Smoke Pod with me, but if you’re not too sure what to take, have a look at our list of the best Gadgets.
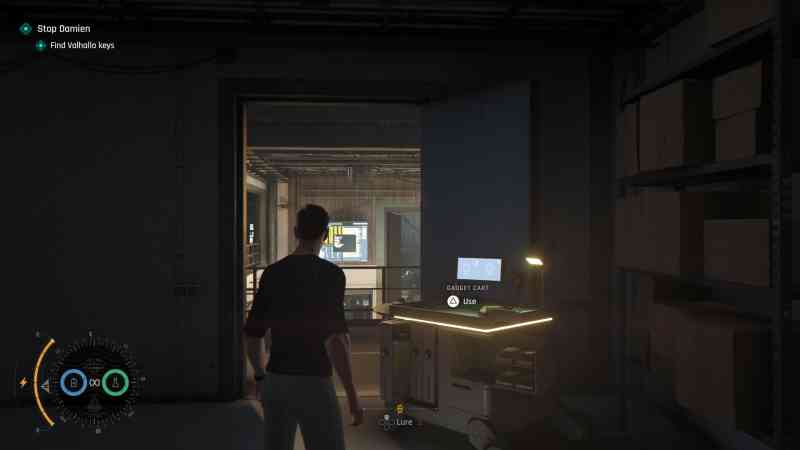

When you’re done sorting out your loadout, exit into the Q-Lab via the door directly beside the Gadget Station.
A brief cutscene shows Damien and his men going through the lab, and you’ll now be notified that your Q-Watch has longer reach. Your next objective – other than stopping Damien – is to go into Wearables and acquire the Valhalla Keys, which is supposedly the only device strong enough to take out Damien and his men.
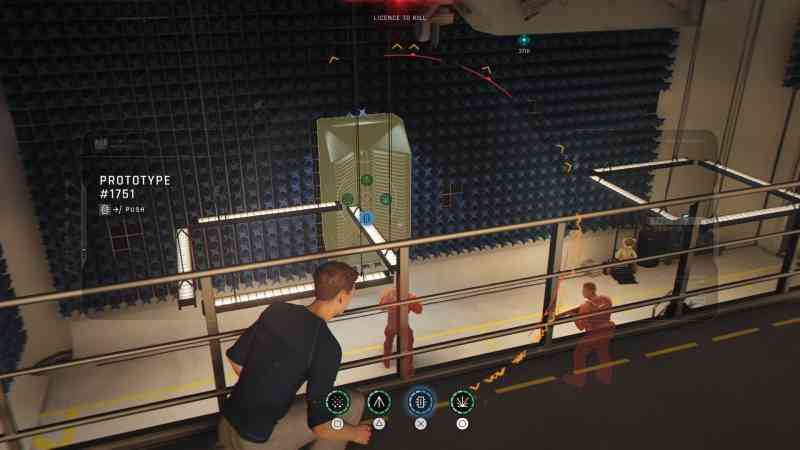
I started by heading left and taking the first right along the bridge. On the way, I spent some time hacking every Prototype in the room and even used a few Missile Pens to clear the unsuspecting guards out below us. You don’t necessarily need to do this but I recommend giving it a go as it’s quite fun seeing what each of the Prototypes are capable of doing, and it’ll make navigating the area a bit easier.

Once you cross the bridge in the first room with the two green cars, keep left to continue heading towards Wearables. At the end of the hall, head left again to reach a stairwell with a drone; turn the drone on and head downstairs.
At the bottom, open the door to your left to enter Wearables, which is fortunately guard-free. In here, cycle the wardrobe directly ahead of you.
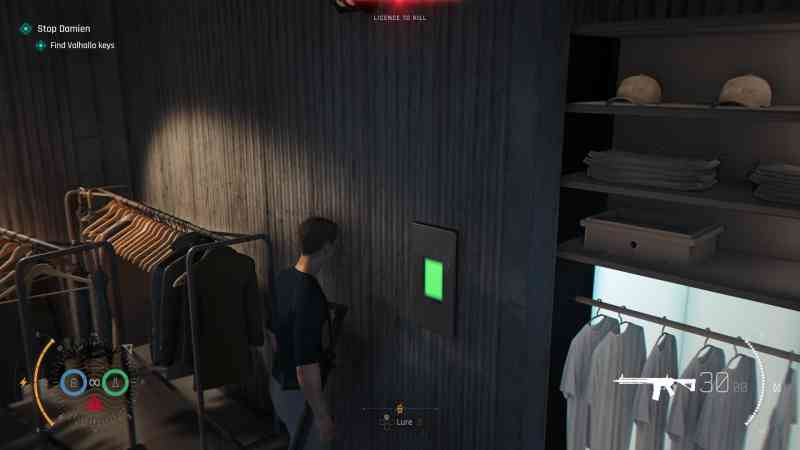

Interact with the clothes on the rightmost side of the wardrobe to collect the Valhalla Keys.
Exit Wearables and prepare for more guards in the lab; I swiftly dispatched these guys using Missile Pens and by hacking Prototypes around the room again. With Q’s special watch to hand, you’ll find that you can use the Missile Pen over and over again, which is certainly helpful right now.
Your next goal is to reach Q’s laptop and override the ongoing lockdown, so go and do that once the room has been cleared out of guards.


Once you start to override the lockdown, more guards will slowly appear, which means it’s time for more fun! As we have been doing, clear these guys out using a combination of the Missile Pen, the surrounding prototypes, and the various weapons scattered across this platform.
More specifically, hack the Auto Turrets that surround Q’s laptop as guards approach; these will conveniently take care of the guards for you.
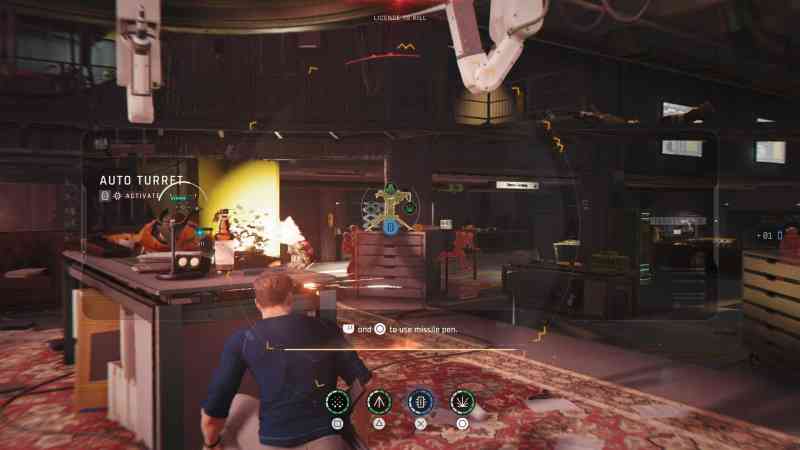

Once you’ve overridden the lockdown and cleared out Damien’s men, head towards the garage (your objective marker) to enter the Valhalla; a bulletproof Aston Martin with machine gun and missile attachments. Nice.
Next, it’s time to clear the area using the Valhalla’s machine guns and missiles. You can also aim for the explosive barrels in the area if need be.


Once the area has been cleared, Damien will have now found his own missile to use and you’ll be prompted to exit the Valhalla for now.
After the cutscene, pursue Damien through the tunnel until you eventually catch up with him (shown below).
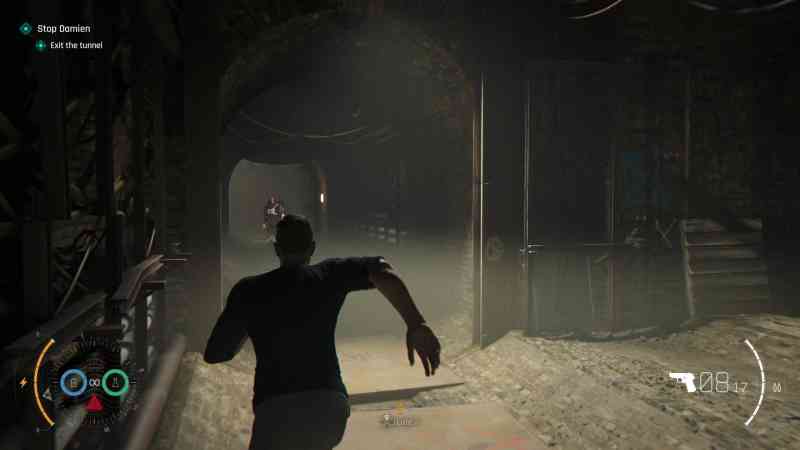

Damien will close a gate on you here, blocking you from following him further. Climb up the ledge to your left and kick down the wooden panel here to keep going after him. Just up ahead, you’ll find yourself starting your final stand-off against Damien.
7. Defeat Damien
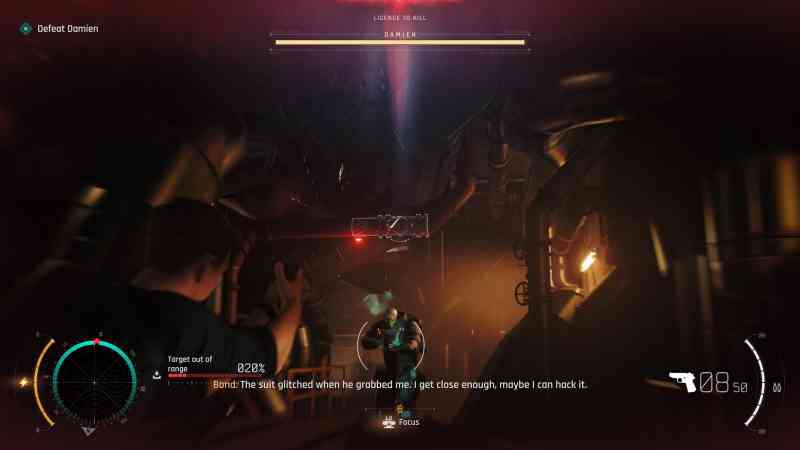
Damien will be wearing a bulletproof suit, and your Gadgets signals will have been jammed, which means you won’t be able to use your pistol or the Missile Pen on Damien during this fight.
You will, however, have started to hack Damien’s suit while in close proximity to him, so your goal for the fight is to stay close to him and complete the hack while avoiding his attacks.
This doesn’t mean you can’t do damage however, because as always, the environment here is your best friend; shoot the red pipes around the area (shown below) to do some explosive damage to Damien’s suit. There’s also explosive barrels to make use of around the area too.


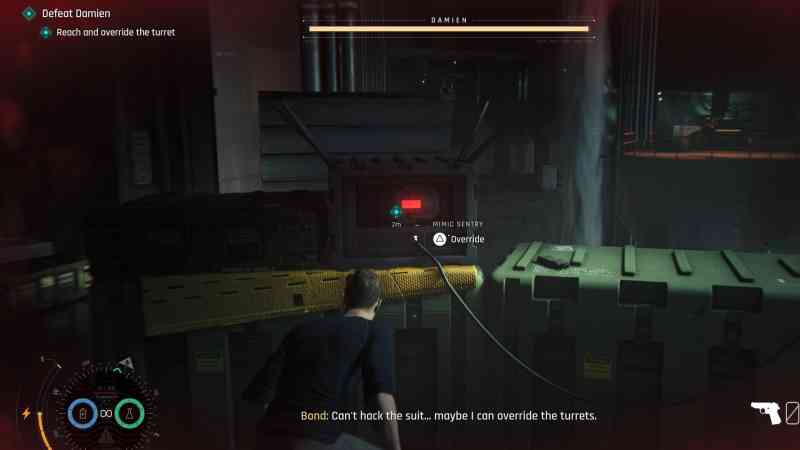
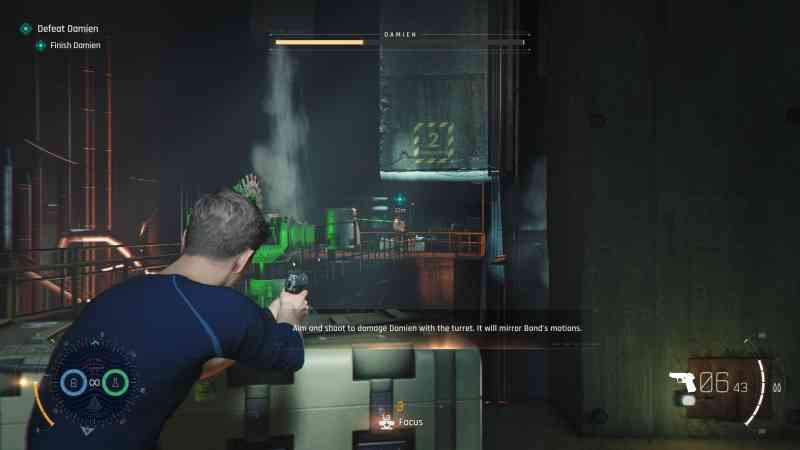
Once you successfully hack Damien’s suit, your Gadgets will come back online allowing you to make use of them again. And after three explosive attacks on Damien, his health bar will have been depleted. The fight will continue outside, where you will then need to reach and override the turret so you can use it to damage Damien.
Once the cutscene ends, you’ll need to head left while staying behind cover. Along the way, there’ll be some parkouring and climbing to do, as well as plenty of cover, but there will be moments where you’ll need to sprint from Damien’s bullets. Just two of these are enough to trigger mission failure, so be careful!
As you make your way to the turrets, some hints about defeating Damien will be revealed. Firstly, the turrets are synced to Damien’s weapon meaning that they’ll aim wherever he aims. Secondly, there are alarms along the way that can be used to distract Damien temporarily, so you can avoid his gunfire and keep going.
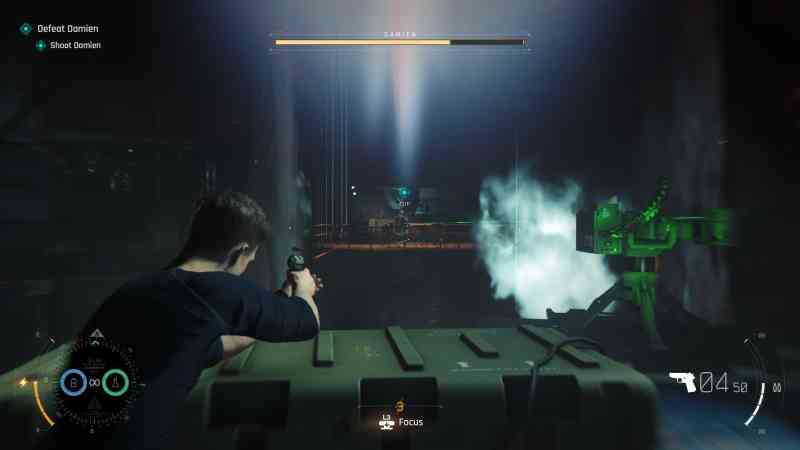
When you reach and override the first turret (shown below), you can use your weapon to fire at Damien and the turret you have overridden will fire at him too, finally dealing some damage.


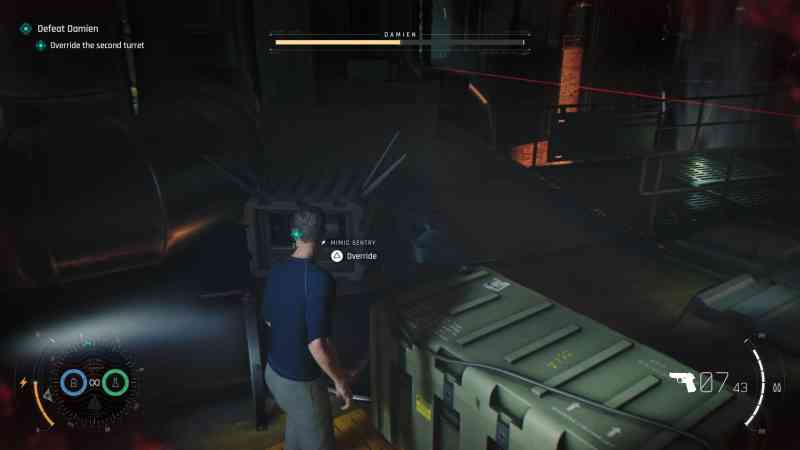
After depleting half of Damien’s health bar, he will destroy the turret. You’ll then need to keep going towards the second turret and override that, then use it to finish him off.


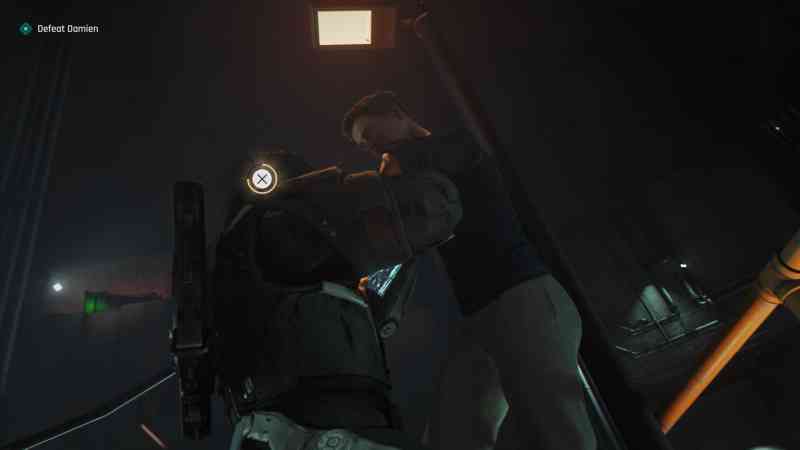
During the following cutscene, complete the QTE to free yourself from the wreckage, and prepare for some more QTE’s as you finish the fight off against Damien.

Now, it’s time to enjoy the ending of 007 First Light. Well done!
If you can’t get enough of 007 First Light and plan on playing through Tactical Simulation galore, check out all door and safe codes, and the best Gadgets to use.