A reference list for achievements, with tips for harder ones. I’ve sorted it by the order you are expected to get them, with hidden ones grouped at the end.
First day

Requirement: Survive one day
Walkthrough: Unpause
Making progress

Requirement: Use Lab to research and then build something
Walkthrough: Build the lab, assign engineers and pick a research. Build researched item.
Randomtown
Requirement: Unlock Randomtown scenario on the World map
Walkthrough: Complete the “Fresh start” tutorial map. Game doesn’t send you to the scenario selection when you pick the corresponding line, you will need to start a new game manually from the main menu.
The Junknado

Requirement: Survive your first Junknado
Walkthough: This weather happens naturally. It might spawn weak explosive barrel that would explode if you don’t select and deconstruct it.
The Influencer

Requirement: Start gaining Influence from one of your Social Groups.
Walkthough: Reach 22 happiness with one of your starting groups.
One Month Alive
Requirement: Survive for over a month
Walkthrough: Play any scenario for 30+ days,
Pirates Life

Requirement: Rob a trader
Walkthrough: Pick an option of “Why pay?” during a trader visit. It kills 2 random citizens. I’d recommend to postpone this option until Dark Tides scenario
Not so mysterious

Requirement: Enter the mysterious building and find out what it is
Walkthrough: An event building that spawns at Randomtown and Rogue lake scenarios. Wait until water level drops sufficiently to enter it, and charge it up. You will need some electricity stored to power it up.
Personal Project

Requirement: Fully complete Personal Project event
Walkthrough: An engineer would ask to use your demolition hut for a personal project. Accept the offer, and supply her with requested items. Requests would consist from random resources like metal or tools, I’ve had random amount of requests, from 5 to 10, project would result in a very nice comfort decoration.
Beacon of Hope

Requirement: Use Beacon of Hope to rescue some people
Walkthrough: Kill the slave trader (when you get an offer to buy some people) to unlock the building. Construct and send the search party,
Tanker
Requirement: Unlock Broken Tanker scenario on the World map
Walkthrough: Play on Randomtown, get the quest and construct the endgame ship. Completing the Randomtown scenario would require two more steps.
Captain Butt Naked

Requirement: Walk naked amongst your people.
Walkthrough: When you hear a rumor that someone plots to overthrow you, have all three groups at sufficiently high happiness, it would allow you to choose “I can walk naked and nothing would happen to me”. Pick this.
Cybertower

Requirement: Unlock Cybertower scenario on the World map
Walkthrough: Pick weather in the Mysterious building during Randomtown or Rogue lake scenarios.
Dark Tides

Requirement: Unlock Dark Tides scenario on the World map
Walkthrough: Have 30+ outsiders, it would trigger an event to praise Father moon, accept it, build an altar and sacrifice something.
Sailing away
Requirement: Complete Randomtown scenario
Walkthrough: It’s a three-step event, you need to build, supply and crew the ship. To help with building the ship there’s usually a sizeable metro-like metal structure to salvage, for supply you need to research and build goods production, to crew the ship you want to make people happy or get a lot of them.
Rogue Lake city

Requirement: Unlock Rogue Lake City scenario on the World map
Walkthrough: Don’t deconstruct your starting boat, wait for an event to trigger that would offer you to repair it. Pick that option. After some time you will get an offer to use the boat, sailing away would unlock the scenario.
Oil Rig
Requirement: Unlock Oil Rig scenario on the World map
Walkthrough: Research fuel pipes in any scenario
Against all odds

Requirement: Complete Rogue Lake City scenario
Walkthrough: Map’s gimmick is the rogue trader event that brings building blueprints instead of picking them though research. Prices increase with purchases in amount and material tiers, going from wood to metal and fuel to sand, and eventually tools and goods. It would be very beneficial to skip some purchases like decorations to get sustainable sand, tools and goods production first.
Map has two repeatable events that make it the best to make a long-term settlement:
- Mad scientist, map exlusive, he permanently improves random group
- Look up!, an equivalent of Cybertower satellite drop, balloon that drops an event chest,containing an attachment to upgrade production building.
Hellrain

Requirement: Encounter Hellrain weather
Walkthrough: It’s a weather exclusive for Tanker scenario, happens around 1 week after you arrive at the new destination.
The Crumbling

Requirement: Unlock Crumbling city scenario on the World map
Walkthrough: It is unlocked after you visit 5th city ruins during Tanker scenario
Tropical Island

Requirement: Unlock Tropical Island scenario on the World map
Walkthrough: Unlock happens when you complete Tanker scenario, on a 10th city ruin visit. All in all, you need to spend 600 fuel on travels, so you want to beeline fuel production.
Democracy Manifest

Requirement: Enact Free Elections policy and let people choose their leaders
Walkthrough: Getting to 100 influence unlocks policies tab, in Social tab choose “Free election” in “Picking leaders”, wait for a week.
Capital Punishment

Requirement: Choose event option that requires Death penalty policy
Walkthrough: Policies – social – death penalty – choose “Death penalty”.
The most common event to use that is having some homeless outsiders to steal from th ecolony.
Ban outsiders from homes, wait, and make an example.
Moon base

Requirement: Contact the Moon base and decommission an old satellite
Walkthrough: Cybertower scenario, main map building. Use the satellite option. You need sufficient energy storage to trigger it, multiple grav batteries at the very top is very helpful.
Cyber Captain

Requirement: Complete Cybertower scenario
Walkthrough: Probably the easiest scenario in the game after Tutorial, reach the event tower, then generate enough electricity to call the base 20 times. Grav batteries & hamster wheel to the victory.
The oil must flow

Requirement: Complete Oil Rig scenario
Walkthrough: The map requires large amount of fuel usage and offers very efficient metal->fuel conversion building. You want to get junk production and metal smelter to go along with it.
Science has a price
Requirement: Use Mad Scientist to permanenlty upgrade one of your Groups
Walkthrough: Rogue lake city exclusive event, repeatedly triggers after around 1 month in, takes 3 people and some goods to produce a permanent buff to a random group. Buffs include things like work speed, movement speed, carry capacity.
New Dawn

Requirement: Complete Tropical Island scenario.
Walkthrough: Essencially, map asks to get The Engineer, The Sailor or The Worker achievement.
It requires reaching 100 happiness with the group, it triggers their end-game quest – having a statue out of 400 sand, 400 tools and 400 metal + 100 people in the group. Every group has the same statue cost. Statue generates 1 influence/hour and you can build multiple of them.
For tropical island Sailors is the best to go for due to their ability to move trees around, which count as a comfort decoration.
For me map completion triggered after reaching 100 happiness & building statue (prior to getting 100 people into the group).
Since making people to switch groups only costs influence as a leader action, you can get all three job achievements there by moving people around.
The Worker

Requirement: Reach 100 Happiness with Workers and build their statue
Walkthrough: Reaching 100 happiness unlocks the blueprint for statue, that costs 400 sand, tools and metal. Another requirement for achievement is actually reaching 100 population of a group.
The Engineer

Requirement: Reach 100 Happiness with Engineers and build their statue
Walkthrough: Reaching 100 happiness unlocks the blueprint for statue, that costs 400 sand, tools and metal. Another requirement for achievement is actually reaching 100 population of a group.
The Sailor
Requirement: Reach 100 Happiness with Sailors and build their statue
Walkthrough: Reaching 100 happiness unlocks the blueprint for statue, that costs 400 sand, tools and metal. Another requirement for achievement is actually reaching 100 population of a group.
Master of Disaster
Requirement: Complete Crumbling City scenario
Walkthrough: Probably the hardest scenario in the game. Game would repeatedly target buildings for deletion, with a choice of spending resources to reinforce or getting some resources from letting buildings fall. Cost scales up fast, and It may target your starting zone, resulting in very awkward repositioning to survive.
Your goal is to build 20 cement foundations – Small ones would take 1000 sand 500 tools, big ones 2000 sand and 1000 tools total.
For sand production it would be easier to go for demolition huts and boats to scavenge surrounding mountains, for tools you would need a reliable production.
If the only way to build small foundation is during low tide, you can trigger it with the Outsider’s altar (need 30 of them to unlock).
End of Madness

Requirement: Complete Dark Tides scenario
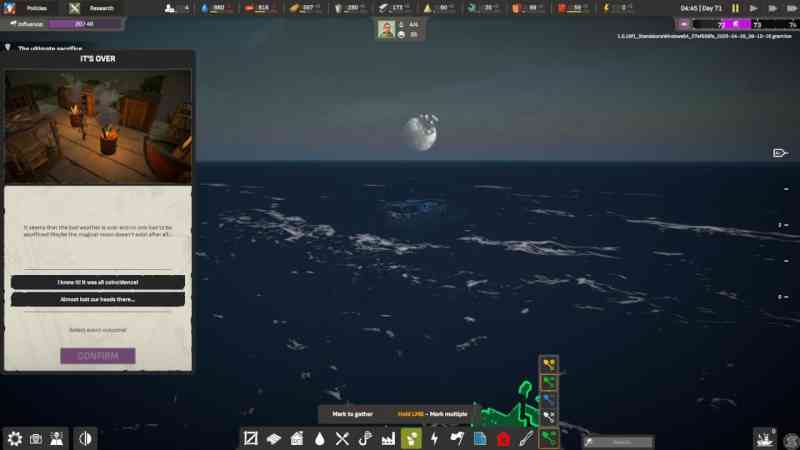
Walkthrough: Scenario is considered complete if you have alive people at day 71. You don’t need to complete “Ultimate sacrifice” quest, and not sacrificing people on the altar would trigger “Don’t believe it” achievement on top.
Your starting resources are wildly insufficient, and it triggers an event that produces some.
Don’t believe it

Requirement: Complete Dark Tides without sacrificing anyone
Walkthrough: The requirement to get this achievement is to get to day 71 without using altar to sacrifice people. Deaths from other means are accepatble.
Cheese way
You can skip altar interaction at all. Build high tower on the highest point of the map. You can use metal houses or temporarily get workers to 85+ happiness with maxed food and water consumption to steal metal pillars from the map. Generate couple hundreds food and water into storages, move Adam and Eve to the wooden house at the top, disable the rest of houses. Homeless people would leave, and you will get single digit consumption per day. Wait.
This was my setup at the 50+ day.
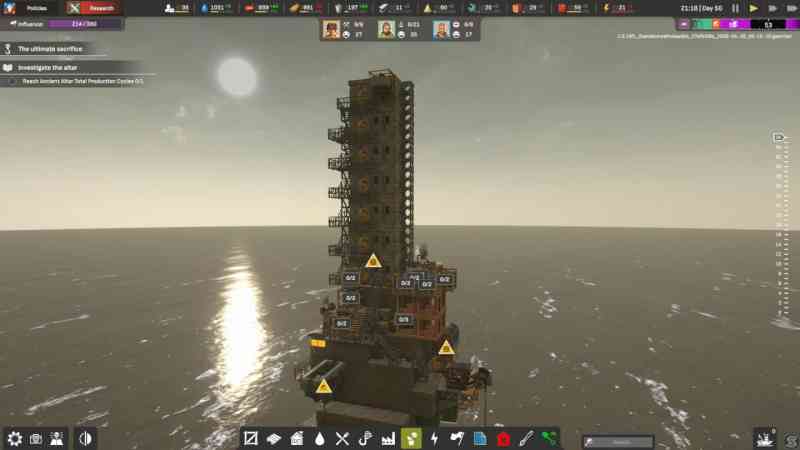
As tides were coming, I moved food and water storage to the roof, and at the day 71 the madness has ended.
Challenge way
You can sacrifice trade goods to decrease water level.
Reliable sources for goods:
- Map contains multiple piles of old world goods inside buildings. Get pathways, deconstruct and blow up walls to get to them before they would be flooded.
- Your starting mountain contains multiple gold veins that can be gathered into trade goods.
- Newcomers can be asked to share supplies or forfeit&leave.
- Outsiders can be asked to give goods if their happiness is high enough.
- You can rob the trader.
- And, finally, you can produce them on your own.
I was able to keep water level at its lowest point using an equivalent of 2 goods productions (1 building buffed by event upgrades)
I’m not leaving

Requirement: Refuse to build the tanker ship
Walkthrough: Building it is a requirement for the Randomtown completion, freely refuse on any other scenario.
50 Strong
Requirement: Have 50 or more people in your settlement
Walkthrough: Accept everyone.
Something Has Fallen

Requirement: Have something collapse
Walkthrough: It might happen naturally with wood rubble during low tide, but you can build something on wood supports, then delete wood supports. The game would go into the warning mode, press and hold “Build” button to confirm.
Fresh meat

Requirement: Eat one of your people
Walkthrough: During an event where one of your people gets an injury pick an option “Close the door, I’ve got an idea”.
Monster

Requirement: Throw a grieving parent over the rail
Walkthrough: Some time after you research Basic leisure buildings an event would fire about drowned child. Pick an option “Have you looked hard enough?”
All Have Fallen

Requirement: Have no people left in your settlement
Walkthrough: Start a new map, don’t build food and water storage, wait.
Related Posts
- All Will Fall: Economy Guide (Industrialization — Basic vs Advanced Production Explained)
- All Will Fall: Raincatchers and Roofs, or, Stop Wasting Your Valuable Junk