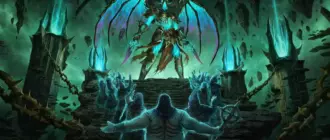
If you thought the main campaign was punishing, wait until you see the sheer torture of Challenge Mode.
Star Fox on Nintendo Switch 2 launched on June 25, 2026, and I spent an unhealthy amount of time digging into its post-game. The branching paths are fun, but the game’s real depth lives in Challenge Mode. You are looking at 192 optional missions spread across all 16 stages. They range from simple hit-count tasks to Expert objectives that demand absolute perfection. If you want to see everything this game has to offer, you will be spending most of your time here after the credits roll.
How Challenge Mode Actually Works
Challenge Mode runs parallel to the main campaign but uses completely separate rules. You can only access levels you already reached through the campaign’s branching path system. You have to explore alternate paths to open every single stage before you can tackle the full list.
Each stage contains exactly 12 challenges: six Normal and six Expert. The Expert set stays locked until you clear all six Normal tasks for that specific level. You can preview the Expert layouts early, which helps you scout the misery awaiting you. If you are trying to earn medals while doing these, stop right now. These are completely independent systems, so if you just need hit targets, check out my Star Fox Switch 2 medal guide instead.
Saves, Checkpoints, and Rewards
One of the few mercies here is checkpoint-free progress saving. The second a challenge’s checkbox appears on your screen, you can quit the run and the completion saves perfectly. You don’t need to finish the mission. If you fail a requirement mid-run, the box turns gray. When that happens, restart immediately. Don’t waste your time pushing forward because Challenge Mode strips away the standard campaign checkpoints. A failed run means starting from absolute scratch.
Knocking these out earns you Character Avatars and AR Accessories for Game Chat if you plug in a USB camera. You start with the Star Fox and Star Wolf teams unlocked, but the classic characters are gated behind these challenges and your campaign medals. You also unlock components for the Battle Banner system used in online Battle Mode. There are 61 backgrounds and 79 emblems up for grabs.
Expert Survival Tactics
Before you throw yourself at the hardest objectives, you need to adjust your playstyle and your hardware.
Boost Your Fire Rate
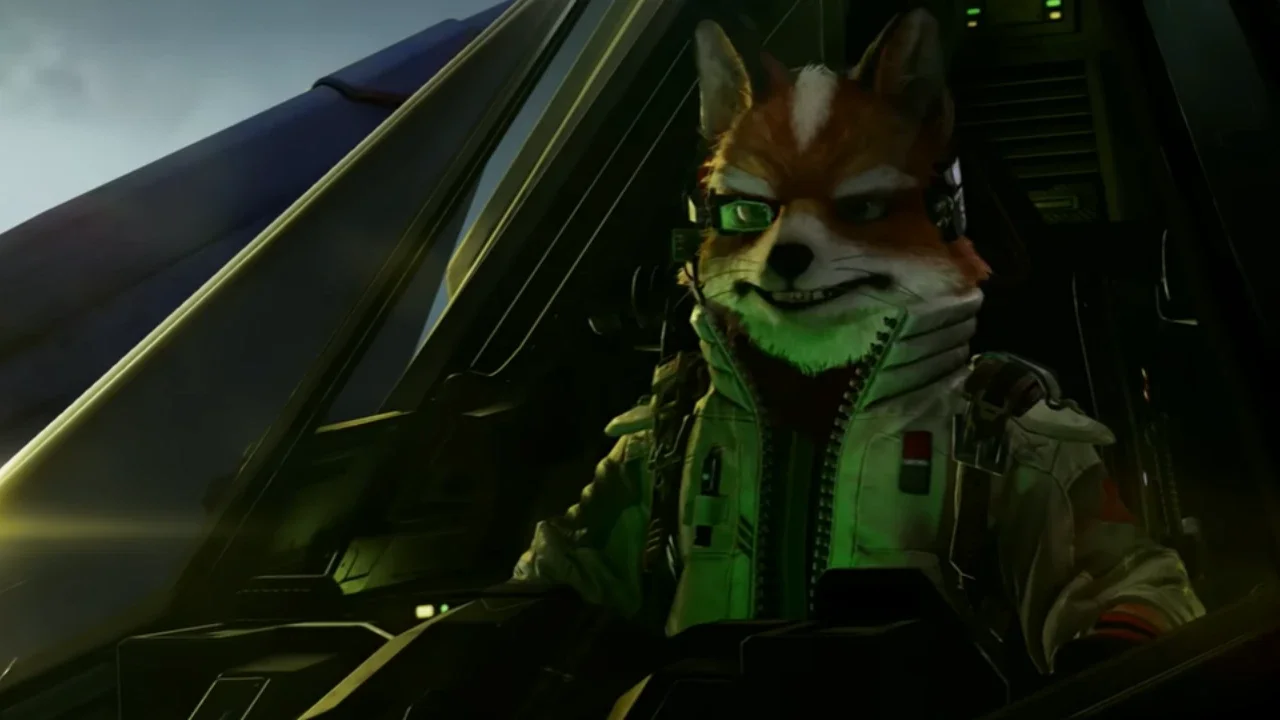
Hitting specific score counts is the backbone of the hardest challenges, and firing faster is your only way out. If you play with the Switch 2 Pro Controller, map the two underneath paddle buttons to the A button for your fire action. Hold them down, navigate to the GL/GR Buttons config section, assign both to A, and you suddenly have three separate fingers cycling through fire inputs. This trick saves my hands during dense enemy waves on Area 6.
Wing Management
On Expert difficulty, any collision causes instant wing damage. A broken wing makes your Arwing drift wildly and ruins your precision targeting. Worse, breaking a wing turns your next laser upgrade into a wing repair pickup. Prioritize flying clean over chasing a few extra hits in the early sectors.
Wingman Management
Several Expert tasks require you to hit score targets without damaging your teammates. Peppy, Slippy, and Falco fly right in your line of fire. Practice your lock-on charged shots for grouped enemies instead of spraying free-fire lasers everywhere and accidentally clipping Slippy.
The Complete Challenge List
Here is every single objective broken down by stage and difficulty. I highly recommend completing conflicting tasks on separate runs and quitting out early to save your sanity (Or what’s left of it).
Corneria
| Difficulty | Objective |
|---|---|
| Normal | Defeat 3 or more enemies with a single charged shot |
| Normal | Complete Falco’s challenge |
| Normal | Defeat all 6 Garuda robots |
| Normal | Defeat all 4 Ski Bots |
| Normal | Complete the mission in 3 minutes or fewer |
| Normal | Destroy every vulnerable part of the Granga |
| Expert | Score 100 hits before taking damage |
| Expert | Complete Falco’s challenge before Falco does |
| Expert | Prevent all buildings from being pushed over |
| Expert | Destroy all Cornerian satellite dishes |
| Expert | Defeat the Attack Carrier within 30 seconds |
| Expert | Defeat the Granga within 10 seconds |
Meteo
| Difficulty | Objective |
|---|---|
| Normal | Score 180 hits |
| Normal | Fly through all 7 energy anomalies |
| Normal | Destroy 8 asteroids before reaching the first large tunnel asteroid |
| Normal | Defeat all 3 snakelike Moras |
| Normal | Defeat 5 Flip Bots |
| Normal | Defeat the Meteo Crusher using hyper lasers |
| Expert | Defeat 30 enemies with charged shots |
| Expert | Destroy 100 large asteroids in the warp channel |
| Expert | Complete the mission without breaking a wing |
| Expert | Defeat 20 butterfly-like Attacker II enemies |
| Expert | Defeat the Meteo Crusher’s first phase without shooting its absorption shield |
| Expert | Defeat 30 Web Ships as they deploy persistent-laser technology |
Sector Y
| Difficulty | Objective |
|---|---|
| Normal | Find and defeat the lone red Shogun Trooper |
| Normal | Destroy 12 panels on the sides of enemy ships |
| Normal | Fully upgrade your shields and lasers |
| Normal | Score 100 hits |
| Normal | Defeat 10 or more enemies with a single bomb |
| Normal | Form a four-ship formation with Star Fox teammates and uncover the hidden item |
| Expert | Score 150 hits without hitting a teammate |
| Expert | Destroy 30 warship turrets |
| Expert | Defeat 14 Shogun Troopers |
| Expert | Defeat both Shogun Warriors within 15 seconds of their appearance |
| Expert | Destroy 12 missiles |
| Expert | Defeat the Shogun Warlord using only charged shots |
Aquas
| Difficulty | Objective |
|---|---|
| Normal | Destroy all 14 Giant Aquas Clams |
| Normal | Pass through 3 trios of Circuit Jellyfish without taking damage |
| Normal | Destroy 20 pieces of pink branching coral |
| Normal | Shoot down 5 stone pillars |
| Normal | Pass through all 5 stone arches |
| Normal | Score 125 hits |
| Expert | Reach Bacoon without firing lasers or torpedoes |
| Expert | Score 100 hits before taking damage |
| Expert | Defeat Bacoon within 70 seconds |
| Expert | Destroy all 21 projectile Spindle Shells |
| Expert | Defeat all 25 Luminous Squid |
| Expert | Defeat all 4 Giant Anglerfish |
Katina
| Difficulty | Objective |
|---|---|
| Normal | Collect 3 gold rings |
| Normal | Score 120 hits |
| Normal | Shoot down a teammate’s target 3 times |
| Normal | Defeat 3 or more enemies with a single charged shot |
| Normal | Destroy all hatches on the Saucerer |
| Normal | Shoot down fewer than 3 allies before completing the mission |
| Expert | Defeat all Invader II enemies before the Saucerer deploys reinforcements |
| Expert | Defeat 5 or more enemies with a single bomb |
| Expert | Score 160 hits without hitting any allies |
| Expert | Complete the mission without breaking a wing |
| Expert | Destroy the Saucerer’s Core Energy Weapon before the timer reaches 50 |
| Expert | Defeat 10 Invader II enemies within the first 20 seconds |
Fichina
| Difficulty | Objective |
|---|---|
| Normal | Defeat all 4 members of the Star Wolf team |
| Normal | Perform a somersault to evade a pursuing Star Wolf member |
| Normal | Destroy all 8 radar stations |
| Normal | Destroy all 26 antennae |
| Normal | Shoot down a teammate’s target 3 times |
| Normal | Clear the map of Invader I enemies before completing the mission |
| Expert | Complete the mission without any teammates being downed |
| Expert | Save the base without damaging a wing |
| Expert | Defeat all 4 members of the Star Wolf team without performing a somersault or U-turn |
| Expert | Score 60 hits |
| Expert | Defeat any Star Wolf member within 30 seconds of their appearance |
| Expert | Defeat any Star Wolf member with a bomb |
Zoness
| Difficulty | Objective |
|---|---|
| Normal | Hit the Sarumarine’s periscope every time it appears |
| Normal | Destroy all cargo containers |
| Normal | Destroy every Radar Buoy without being spotted |
| Normal | Collect 2 supply rings and 1 bomb with a single somersault before reaching the Sarumarine |
| Normal | Follow Slippy and reveal a hidden power-up |
| Normal | Defeat all 3 monstrous, crab-like Kani |
| Expert | Fly under 3 waterwheel gates without taking damage |
| Expert | Somersault under a Todora sea dragon 2 times |
| Expert | Score 270 hits |
| Expert | Destroy all Radar Buoys using locked-on charge shots without being spotted |
| Expert | Defeat 30 Patrol Boats |
| Expert | Defeat 10 Z-Shrimp |
Solar
| Difficulty | Objective |
|---|---|
| Normal | Score 80 hits |
| Normal | Avoid taking damage from direct contact with Solar’s plasma surface, including waves |
| Normal | Destroy 25 enemies and rocks with bombs |
| Normal | Complete the mission without ever fully depleting your shield gauge |
| Normal | Collect 40 supply rings |
| Normal | Dispel 5 waves using bombs before reaching Vulcain |
| Expert | Destroy 40 rocks with noncharged laser fire |
| Expert | Collect 6 bombs |
| Expert | Defeat Vulcain in 55 seconds |
| Expert | Reach Vulcain without collecting any supply rings except when your shield gauge is red |
| Expert | Defeat 25 flying Gores |
| Expert | Defeat Vulcain without getting hit |
Sector X
| Difficulty | Objective |
|---|---|
| Normal | Defeat Spyborg using hyper lasers |
| Normal | Find the hidden wormhole |
| Normal | Score 120 hits |
| Normal | Collect 5 gold rings |
| Normal | Destroy 10 Proximity Mines with a single bomb |
| Normal | Destroy 20 SX Lasers |
| Expert | Find the hidden power-up in the secret corridor |
| Expert | Defeat Spyborg before Slippy is downed |
| Expert | Fly through the left path in 60 seconds without breaking a wing |
| Expert | Complete the mission without taking any damage |
| Expert | Destroy 15 floating Spy Eyes |
| Expert | Defeat 30 shups in the wormhole |
Sector Z
| Difficulty | Objective |
|---|---|
| Normal | Land the final shot on all 6 Copperhead Missiles |
| Normal | Defeat 15 Invader III enemies |
| Normal | Destroy 5 salvage crates |
| Normal | Collect 15 supply rings |
| Normal | Fly into the Great Fox’s repair bay while shield gauge is critical |
| Normal | Defeat an enemy while performing a somersault |
| Expert | Defeat 7 Invader III enemies within a 10-second span |
| Expert | Destroy a Copperhead Missile when it’s within 200 sm of the Great Fox |
| Expert | Destroy all 12 salvage crates before ROB64 first detects an incoming missile |
| Expert | Successfully defend the Great Fox without taking any damage |
| Expert | Destroy all 6 Copperhead Missiles before they get within 1000 sm of the Great Fox |
| Expert | Clear the map of all enemies, including Copperhead Missiles |
Macbeth
| Difficulty | Objective |
|---|---|
| Normal | Use the rail switch to divert the Forever Train |
| Normal | Defeat 25 airborne enemies |
| Normal | Score 120 hits |
| Normal | Collect 5 gold rings |
| Normal | Defeat the Mechbeth in combat without getting lifted by its tail attack |
| Normal | Save your teammates from pursuit 5 times |
| Expert | Pass through 10 gateways without getting hit by their sliding doors |
| Expert | Knock down all 13 barricade walls |
| Expert | Destroy 12 Forever Train cars |
| Expert | Destroy 15 defense towers |
| Expert | Destroy all 38 boulders |
| Expert | Defeat the Mechbeth in combat before reaching distance marker 300 |
Titania
| Difficulty | Objective |
|---|---|
| Normal | Score 120 hits |
| Normal | Reach the Goras without touching any land mines |
| Normal | Defeat 20 airborne enemies using noncharged laser fire |
| Normal | Defeat the Goras without shooting Slippy |
| Normal | Collect all 8 gold rings |
| Normal | Destroy all 3 Laser Turrets |
| Expert | Use hover to evade the Goras’s tail swipe |
| Expert | Avoid colliding with any stone pillars |
| Expert | Destroy 60 Spiny Cacti |
| Expert | Defeat 40 enemies using bombs |
| Expert | Defeat all 5 Desert Crawlers with noncharged laser fire |
| Expert | Destroy 8 Jumping Bombs |
Area 6
| Difficulty | Objective |
|---|---|
| Normal | Destroy 50 Proximity Mines |
| Normal | Destroy the initial barrage of 5 Ninjin Missiles |
| Normal | Destroy all 3 arms before the Gorgon phases out |
| Normal | Reach the Gorgon with fully upgraded shields and lasers |
| Normal | Take down a Zeram-Class Cruiser with a bomb |
| Normal | Complete the mission without any teammates being downed |
| Expert | Take down 5 Zeram-Class Cruisers |
| Expert | Successfully dodge the Gorgon’s laser attack |
| Expert | Score 320 hits |
| Expert | Reach the Gorgon without collecting any supply rings or power-ups |
| Expert | Destroy 2 Ninjin Missiles with charged shots |
| Expert | Destroy the first 12 Umbra-Class Defense Stations |
Bolse
| Difficulty | Objective |
|---|---|
| Normal | Score 130 hits |
| Normal | Complete the mission without any teammates being downed |
| Normal | Collect 3 gold rings |
| Normal | Defeat 5 Bolse Fighters with noncharged laser fire |
| Normal | Defeat all 4 members of the Star Wolf team |
| Normal | Complete the mission in 4 minutes or fewer |
| Expert | Complete the mission without destroying any laser cannons |
| Expert | Destroy the Bolse Core within 60 seconds of its appearance |
| Expert | Complete the mission without breaking a wing |
| Expert | Score 190 hits |
| Expert | Complete the mission without getting hit by the Bolse Core’s lasers |
| Expert | Destroy all 6 energy towers within the first 80 seconds |
Venom
| Difficulty | Objective |
|---|---|
| Normal | Defeat all 30 Venom Fighter I enemies in the first wave with a single bomb |
| Normal | Exit the canyon with fully upgraded shields and lasers |
| Normal | Defeat the Golemech without taking damage from any hazards in its tunnel |
| Normal | Disable all lasers in the tunnel leading to Andross |
| Normal | Make Andross inhale 3 bombs |
| Normal | Defeat Andross within 70 seconds |
| Expert | Defeat 40 Venom Tanks |
| Expert | Reach the temple without breaking a wing |
| Expert | Score 100 hits in the canyon without hitting a teammate |
| Expert | Defeat the Golemech within 45 seconds |
| Expert | Destroy 1 of Andross’s hands with a charged shot |
| Expert | While fighting Andross, destroy 10 salvage crates with a single bomb |
Venom 2
| Difficulty | Objective |
|---|---|
| Normal | Defeat Pigma first |
| Normal | Defeat all 4 members of the Star Wolf team without any teammates being downed |
| Normal | Collect all four supply rings dropped by downed Wolfen II fighters |
| Normal | Collect a 1-Up in the tunnel leading to Andross |
| Normal | Destroy both of Andross’s floating eyeballs using bombs |
| Normal | Defeat Andross’s true form without getting caught by his tendrils |
| Expert | Defeat any Star Wolf member within 35 seconds of their appearance |
| Expert | Defeat all 4 members of the Star Wolf team without breaking a wing |
| Expert | Destroy both of Andross’s floating eyeballs within 30 seconds of his transformation |
| Expert | Defeat Andross without taking damage |
| Expert | Defeat Andross’s true form without causing him to teleport |
| Expert | Complete the final escape sequence without taking damage |